With a domain name, visitors can go directly to "your-site-name.com" instead of going to "easysite.com/your-site-name."
(Visitors will not see "easysite" in the address bar when they visit using your domain name.)
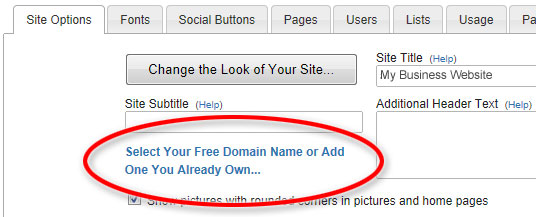
Easysite gives you a free domain name to use with your site after your initial Easysite payment. Select your free domain name to use with your site using the Site Admin > Site Options > "Select Your Free Domain Name or Add One You Already Own" link.
If you already own a domain name the easiest way to hook it up to your easysite is to send the login information for the site where you purchased the domain name from to [email protected]. We'll log into the site where you puchased the domain name and set the settings, test it and send back a confirmation email when we're done. Once completed, you'll be able to access your easysite from either your domain name or easysite.com/your-site-name.
If you're comfortable updating the DNS settings for your domain name, here are the technical instructions:
- Log into the site where you purchased your domain name and edit your DNS records. (Do not change your DNS servers. You just want to edit the DNS records for your domain name.)
- Add or update the blank "@" A-Name record for your domain to point it to 64.87.17.226 (our IP address.)
- Add or update the "www" record for your domain, if the "www" record is a C-Name record, then just point it to the A-Name record you already updated: @. Otherwise, if "www" is an A-Name record, have it resolve to the 64.87.17.226 IP address.
- Make sure that the domain name is entered into your easysite's Site Admin > Site Options > Add a Domain Name.
- Wait for a day or so for your domain name to resolve and start working throughout the Internet.